Dr. Martens Men’s Leather Ankle Boots: Fit & Care
Leather ankle boots from Dr. Martens are known for their durable build, distinctive sole, and versatile styling—from casual denim to smarter layered looks. This guide covers what to look for in fit and comfort, how to handle the break‑in period, practical outfit pairings, and care steps that keep black leather looking sharp through heavy wear. For more guidance, see The Dr Martens Care Guide | TOWER.
Shop the Look (In Stock)
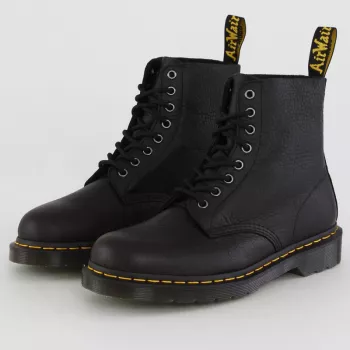
- Dr. Martens Men’s Black Leather Ankle Boots — black leather ankle boots built for everyday wear.
- AI Tips to Elevate Your Writing Voice | Editable Writing Tone Checklist (Digital Download) — a simple checklist-style download that can also work as a handy way to track your boot break‑in and care routine.
What Makes These Boots Stand Out
- Leather ankle-boot profile that pairs easily with jeans, chinos, and workwear-inspired outfits.
- Sturdy construction designed for regular rotation and long-term wear.
- Iconic silhouette that works across casual and elevated casual settings.
- Black leather finish that can be kept matte or polished depending on care products.
Fit and Sizing: Getting the Right Feel
A good fit in a leather ankle boot should feel secure and stable without turning stiff leather into a pressure trap. Focus on three zones: heel lock, midfoot support, and toe comfort. If any of those are off, small adjustments (especially lacing and sock choice) can make a bigger difference than expected.
- Aim for a secure heel with minimal lift; too much heel slip usually means sizing or lacing needs adjustment.
- Toes should have wiggle room while the midfoot feels supported—tight midfoot pressure often eases as leather softens.
- Wear the socks intended for typical use when trying on (thin dress socks vs. thicker boot socks can change fit noticeably).
- Use lacing to fine-tune: tighter at midfoot for support, slightly looser near the ankle for comfort on longer walks.
- If between sizes, consider how the leather will relax with wear and whether an insole will be added.
Quick Fit Check
| Area | Good Sign | Red Flag |
|---|---|---|
| Heel | Stays seated with light movement | Significant lift or rubbing immediately |
| Toebox | Toes can move; no pinching | Toes press the front when standing |
| Midfoot | Snug, supportive feel | Sharp pressure or numbness |
| Ankle/Collar | Stable without biting | Cuts in or causes hot spots quickly |
| Overall | Comfort improves after a few minutes | Pain increases the longer you wear them |
Break‑In Without the Blisters
Leather that lasts tends to start out firm. The goal is to soften the boot gradually, while protecting common friction areas (heel, ankle bones, and the top of the foot under the laces). If you’re prone to hot spots, it helps to treat prevention like part of the first-week routine, not a last-minute fix.
- Start with short indoor sessions to identify friction points before extended outdoor wear.
- Use thicker socks or double-sock briefly during early wears to reduce rubbing.
- Apply a leather conditioner lightly to help soften stiff areas; avoid over-saturating seams.
- Protect hot spots with blister pads or tape on heel and ankle areas.
- Alternate days early on to let the leather and lining recover and to reduce irritation.
- Retie laces mid-walk; loosening slightly can relieve pressure without sacrificing stability.
For practical blister treatment and when to leave a blister intact, the American Academy of Dermatology Association provides clear guidance here: Blisters: How to Treat.
Comfort and Support: Insoles, Socks, and Lacing
Small upgrades can change how ankle boots feel over a full day. The key is to improve underfoot support and reduce moisture—without making the upper so tight that break‑in becomes a battle.
- Consider a supportive insole if standing or walking for long shifts; ensure it doesn’t make the boot too tight.
- Moisture-wicking socks help reduce friction and keep feet drier in leather boots.
- If the arch feels unsupported, a slim insole can add comfort without dramatically changing volume.
- Skip overly thick insoles during break-in if the upper is still stiff—comfort often improves as the leather molds.
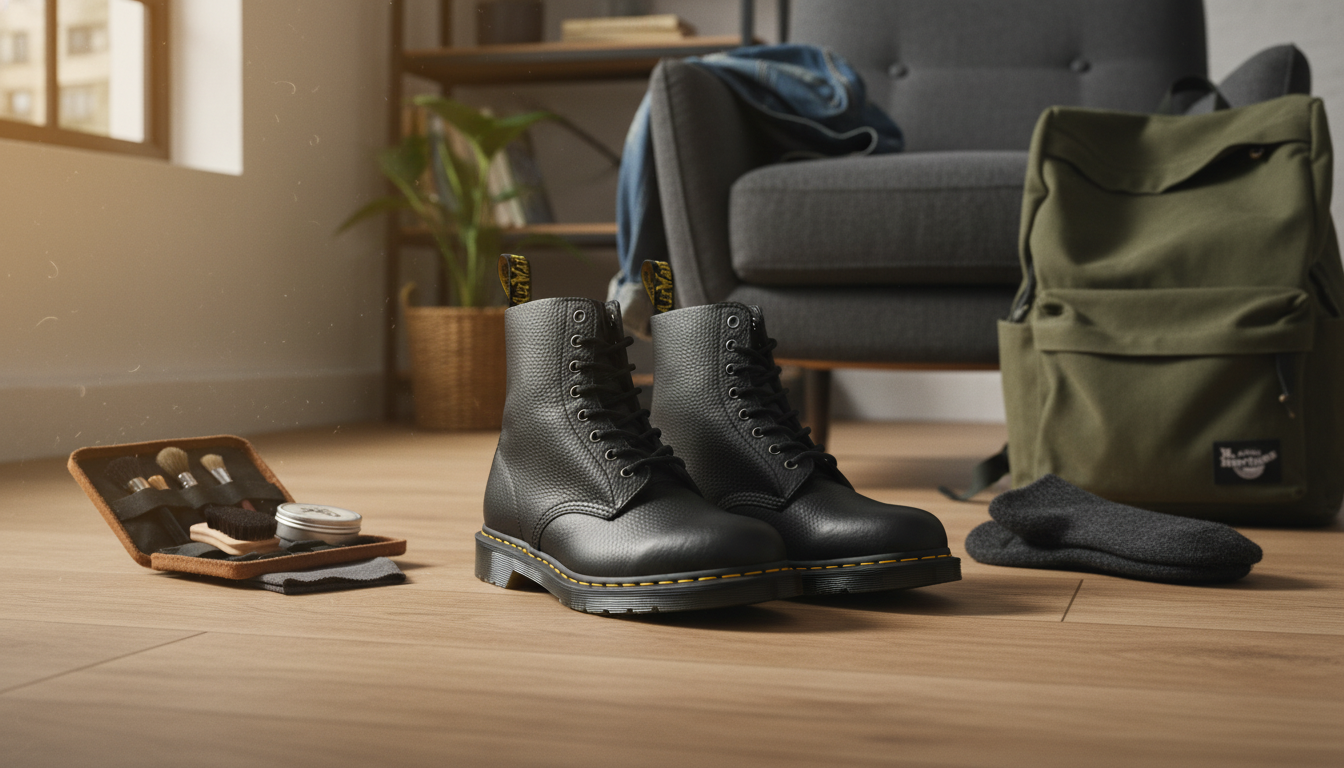
How to Style Black Leather Ankle Boots
Leather Care and Long‑Term Maintenance
For brand-specific product recommendations and step-by-step technique, see Dr. Martens — Shoe Care Guide. For broader context on leather standards and responsible supply-chain practices, the Leather Working Group is a widely recognized industry organization.
Simple Care Schedule
| When | What to Do | Why It Helps |
|---|---|---|
| After each wear | Quick wipe with soft cloth | Prevents dirt from grinding into leather |
| Every few weeks | Light conditioning | Maintains suppleness and reduces cracking risk |
| As needed | Spot clean scuffs; polish if desired | Restores appearance and evens color |
| After getting wet | Air dry; condition once dry | Protects leather from drying out and stiffening |
| Seasonal | Deep clean + condition | Resets protection for heavy-use months |
When These Boots Are a Great Choice
FAQ
Do Dr. Martens men’s leather ankle boots run true to size?
Fit can vary by foot shape and sock thickness, so the most reliable test is a secure heel with minimal lift and enough toe room to wiggle. If the midfoot feels snug, that often relaxes as the leather softens; if your toes hit the front when standing, sizing up (or reducing insole thickness) is usually the better fix.
How long does it take to break in leather ankle boots?
Many people feel noticeable improvement after several short wears, with a fuller break‑in typically taking a couple of weeks depending on frequency and distance. Gradual sessions, blister protection on hot spots, and light conditioning on stiff areas can make the process more comfortable.
How should black leather boots be cleaned and conditioned?
Wipe them down after wear, spot clean scuffs with a damp cloth, and condition periodically to keep the leather supple. If they get wet, let them air dry at room temperature first, then condition once fully dry; add black polish when you want deeper color and more shine.


Leave a comment